Violin Solidworks Assembly
Last updated: 2/3/2026
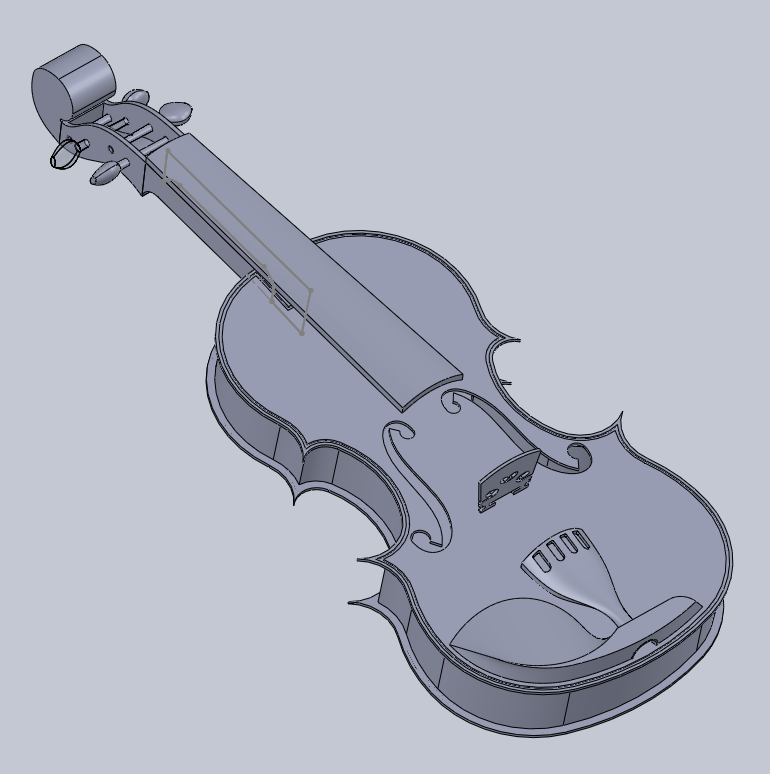
A violin Solidworks assembly made of 7 distinct parts
For my final project in a Mechanical Designs and Drawings course, I was tasked with researching, modeling, and assembling various parts of a violin, matching real life dimensions as closely as possible. The assembly consists of 7 distinct parts:
- Violin base
- Neck & Scroll
- Tuning pegs
- Bridge
- Fingerboard
- Chin rest
- Tailpiece
Violin Base
Starting off, I learned about the "Four Circles" method, a traditional method for designing the proportions of a violin. Using an image I found online, I sketched the overlay using the circles to define radius constraints until it's fully defined.

The sound hole is an opening in the body that helps to project sound more efficiently. Violins have F-holes, which required some tricky splines and constraints to get it to look right.

The final result of the violin base

Neck and Scroll
The neck and scroll is traditionally the most complicated piece of the violin to make. Due to time constraints, the scroll I designed here is a greatly simplified version. Lots of room for improvement.


Tuning Pegs
There are lots of different designs for tuning pegs on violins. I designed a pretty elegant shape for mine, using three oval sketches and a lofted surface between them.

Bridge
The bridge is a piece that sits in the middle of the violin base, and transfers string vibrations to the body and maintains string height. The base of the violin actually puffs out a bit in the middle (like a popcorn bag), but is completely flat in my design for simplification. Hence, my bridge design needed to accomodate this change.

Fingerboard
The fingerboard is a simple piece to model, but would be difficult to get the dimensions correct. For this piece, I sketched it in the assembly itself, so that the part lines up perfectly with the neck and the bridge.


Chin Rest
The chin rest is attached to the body of the violin, and helps position the player's jaw or chin. My design is a simple lofted surface between two sketches, with a through hole for the tailpiece to sit in.


Tailpiece
The tailpiece anchors the strings at the lower end of the violin, and is the final piece I designed. I sketched the side profiles on four parallel planes, and created a lofted surface between them. I sketched the holes on the top plane, and extruded it as a blind hole.

Final Assembly
Here are some additional photos of the final result! Overall, I gained a deeper appreciation for violin craftsmanship, and improved my modeling skills in Solidworks.

